
Introduction
Ever looked in the mirror and thought, “I could totally do this myself”? Well, if you’re talking about a burst fade, you might be right. This sleek and stylish haircut has been taking over barbershops—and the internet—for good reason. The burst fade is bold, modern, and surprisingly achievable at home with the right tools and a bit of patience.
Let’s dive into everything you need to know about blending a burst fade at home like a pro.
Understanding the Burst Fade
What Makes the Burst Fade Unique
The burst fade gets its name from the “burst” effect around the ears. Instead of fading straight down like a taper, the fade curves around the ear and blends into the neckline. It gives your haircut a round, explosive shape that adds dimension and flair.
The Difference Between a Burst Fade and Other Fades
Unlike low, mid, or high fades, the burst fade focuses specifically on the area around the ear. It’s tighter and cleaner on the sides, while the top can vary—from curly tops to mohawks or even mullets.
Choosing the Right Burst Fade Style for You
You can customize a burst fade in many ways:
-
Burst Fade Mohawk: Bold and edgy.
-
Burst Fade with Curls: Adds volume and texture.
-
Burst Fade with a Beard: Smooth transition from hair to facial hair.
Choose the one that matches your vibe and hair type.
Essential Tools You’ll Need
Clippers and Trimmers
A reliable clipper is your best friend. Go for a model with adjustable levers for precision. A smaller trimmer will help you line up edges neatly.
Guards and Combs
Clipper guards are a must for blending smoothly. Have sizes #0 through #4 handy. A fine-tooth comb helps guide the hair evenly.
Mirrors and Lighting
Get a handheld mirror and position it behind you. Good lighting—preferably natural or bright white—ensures no patchy spots.
Optional Styling Products
Pomade, gel, or matte clay can enhance your final look. A bit of product goes a long way in showing off that clean fade.
Prepping Your Hair for the Fade
Wash and Dry Your Hair
Clean hair is easier to cut. Use a mild shampoo, rinse well, and dry thoroughly—wet hair can clump and mess with clipper flow.
Section Your Hair Correctly
Use clips to separate the top from the sides. This ensures you only fade the areas you intend to.
Comb Out Any Tangles
Comb your hair in its natural direction so you can see your true hair pattern.
Step-by-Step Guide to Blending a Burst Fade
Step 1 – Set Your Fade Line
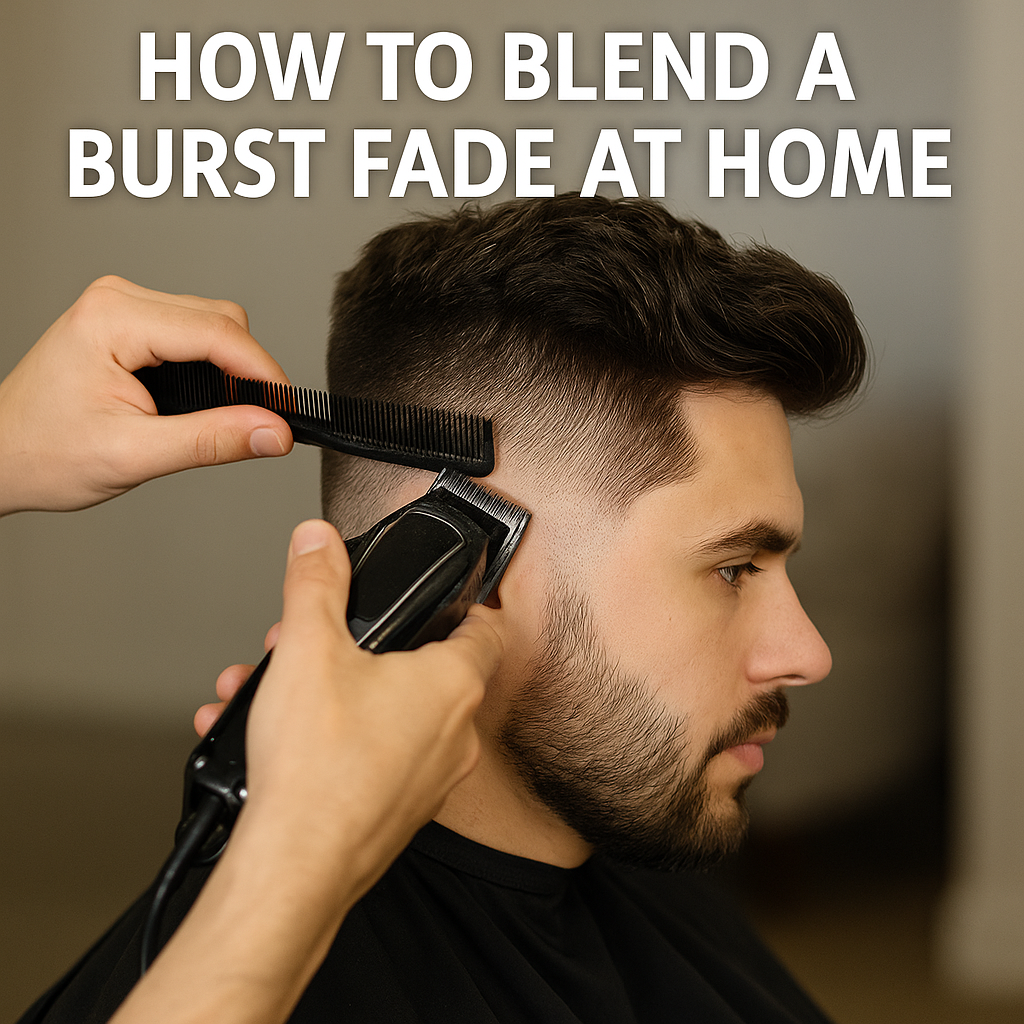
Decide where you want your fade to start. Typically, this is just above the ear, curving slightly backward toward the neckline. Use a trimmer to outline this area.
Step 2 – Start with the Lowest Guard
Use a #0 or open clipper to remove the hair below your fade line. Keep movements consistent and light.
Step 3 – Blend Gradually Upwards
Switch to a #1 guard and move slightly above your initial line. Use short, flicking motions to blend upward. Continue this process with larger guards (#2, #3, etc.).
Step 4 – Use the Lever to Fine-Tune the Fade
The lever on your clipper adjusts blade closeness. Use it halfway or fully open to blur any visible lines between layers.
Step 5 – Detail Around the Ears and Neck
This is where the “burst” magic happens. Use your trimmer carefully around the ear curve and neckline. Precision matters here.
Step 6 – Check Symmetry on Both Sides
Use your mirror setup to inspect both sides. Small adjustments make a big difference in achieving that clean, balanced look.
Pro Tips for a Flawless Burst Fade
Use Multiple Mirrors for Better Angles
Having two or even three mirrors helps you catch missed spots and maintain symmetry.
Work in Good Lighting
Natural daylight or bright LED lighting ensures you see every fade line clearly.
Take Breaks and Reassess
Your eyes can trick you after staring too long. Take a step back, breathe, and recheck your work.
Watch for Common Mistakes
Avoid cutting too high or uneven blending. Always start lower than you think—you can cut more, but you can’t grow it back instantly!
Styling Your Burst Fade
Best Hairstyles to Pair with a Burst Fade
Some killer combos include:
-
Burst fade mohawk
-
Burst fade curly top
-
Burst fade with side part
-
Burst fade mullet
Each adds personality and complements different face shapes.
Using Products for Texture and Shine
Pomade gives a glossy finish, while matte clay offers a more natural, textured look. A small amount rubbed between your palms will do.
How to Maintain the Fade Over Time
Brush daily, wash regularly, and apply a bit of product when needed. A quick trim every 2–3 weeks keeps it looking fresh.
Common Mistakes and How to Fix Them
Uneven Blending
Use the lever and shorter guards to clean up rough lines.
Going Too High or Too Low
If your fade goes too high, blend the top hair longer to balance it out. Too low? Extend the fade slightly upward.
Cutting Too Much Hair
Go slow. Remember, it’s better to make multiple light passes than one deep cut.
Maintaining Your Burst Fade
Weekly Touch-Ups
Use your trimmer to keep the edges clean and sharp.
Proper Washing and Conditioning
Keep your scalp healthy with a sulfate-free shampoo and hydrating conditioner.
When to Redo the Fade Completely
Once the fade lines disappear or the sides grow out unevenly, it’s time for a full refresh.
Conclusion
Blending a burst fade at home might sound intimidating, but with a bit of practice, patience, and the right tools—you’ve got this! It’s all about technique, not speed. So, set up your mirrors, grab your clippers, and start small. Before you know it, you’ll be rocking a fresh, professional-looking fade made by you.
FAQs
How often should I refresh my burst fade?
Every 2–3 weeks to maintain that crisp, clean look.
Can I do a burst fade with curly hair?
Absolutely! Curly hair actually enhances the burst effect, making it pop even more.
What’s the best clipper brand for beginners?
Wahl, Andis, and Oster are excellent choices for beginners.
How do I prevent harsh fade lines?
Use the clipper lever and blend with small, upward flicking motions.
Is it okay to use scissors for blending?
Yes, for minor detailing—but clippers are best for smooth, consistent fades.